tutorial – how to create a printing form using SSRS
to make a printing form using SSRS, we need 1 temporary tables, 1 SSRS Report, 1 controller class, 1 contract class and 1 DP (data provider) class. And also we gonna need menu items, and jobs (for testing data, incase we need it), and Modified PurchEditLines Form
as example, we’re gonna making a receipt print from purchase order
- create a temporary table
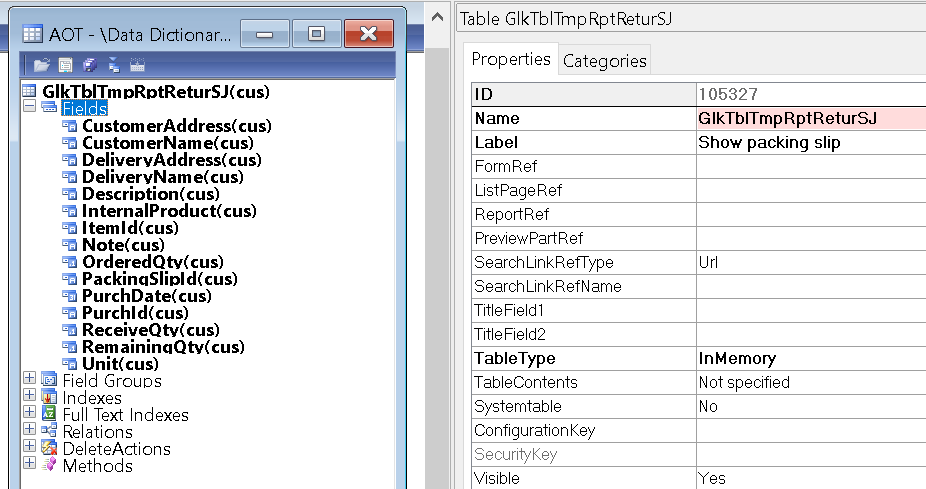
- see the picture below

- Set Table Type : In Memory
- Create a field just like the picture does, CustomerAddress (250), CustomerName (100), DeliveryAddress (250), DeliveryName (100), Description (250), InternalProduct (100), ItemId (20), Note (250), OrderedQty (real-Qty), PackingSlipId (20), PurchDate (date-transdate), ReceiveQty (real-Qty), RemainingQty (real-Qty), Unit (10)
- see the picture below
- create Controller Class
- see the source code below
public class GlkRptSjReturController extends SrsReportRunController
{
    GlkRptSjReturContract       _contract;
    PurchParmUpdate             _PurchParmUpdate;
}

protected void prePromptModifyContract()
{
    FormDataSource              fds;
    ;
    _contract = this.parmReportContract().parmRdpContract() as GlkRptSjReturContract;
    fds = args.record().dataSource();
    _PurchParmUpdate = args.record();
    _contract.parmParmId(_PurchParmUpdate.ParmId);
}

public static client void main(Args args)
{
    GlkRptSjReturController ssrsController;
    FormDataSource          fds;

    fds = args.record().dataSource();
    ssrsController = new GlkRptSjReturController();
    ssrsController.parmArgs(args);
    ssrsController.parmReportName(ssrsReportStr(GlkRptReturSJ,RptReturSJ));
    ssrsController.parmShowDialog(false);
    ssrsController.startOperation();
}
- see the source code below
- create Contract Class
- see the source code below
[DataContractAttribute]
class GlkRptSjReturContract
{
    ParmId _ParmId;
}

[DataMemberAttribute('ParmId')]
public ParmId parmParmId(ParmId ch = _ParmId)
{
    _ParmId = ch;
    return _ParmId;
}

public boolean validate()
{
    return true;
}
- see the source code below
- create DP Class
- see the source code below
[SRSReportParameterAttribute(classstr(GlkRptSjReturContract))]
class GlkRptSjReturDP extends SRSReportDataProviderBase
{
    GlkTblTmpRptReturSJ   _temptable;
}

[SRSReportDataSetAttribute(tableStr(GlkTblTmpRptReturSJ))]
public GlkTblTmpRptReturSJ getTempTable()
{
    select * from _tempTable;
    return _tempTable;
}

[SysEntryPointAttribute]
public void processReport()
{
    PurchParmTable              _PurchParmTable;
    PurchParmLine               _PurchParmLine;
    ParmId                      _ParmId;
    PurchTable                  _PurchTable;
    PurchLine                   _PurchLine;
    GlkRptSjReturContract       _contract;
    VendTable                   _vend;
    LogisticsPostalAddressView2 _address1;
    ;

    _contract = this.parmDataContract() as GlkRptSjReturContract;
    _ParmId = _contract.parmParmId();

    while select * from _PurchParmTable
        join _PurchParmLine
        where _PurchParmTable.ParmId == _ParmId
            && _PurchParmLine.ParmId == _ParmId
    {
        if(!_PurchTable)
        {
            _PurchTable = PurchTable::find(_PurchParmTable.PurchId);
            _vend = VendTable::find(_PurchTable.OrderAccount);
        }

        _PurchLine = PurchLine::findRecId(_PurchParmLine.PurchLineRecId);

        _temptable.clear();
        _temptable.ItemId           = _PurchParmLine.ItemId;
        _temptable.PurchId          = _PurchParmTable.PurchId;
        _temptable.PurchDate        = systemDateGet();
        _temptable.PackingSlipId    = _PurchParmTable.Num;
        _temptable.Note             = _PurchParmTable.NoteDesc;
        _temptable.Description      = _PurchParmLine.name();
        _temptable.ReceiveQty       = -1 * _PurchParmLine.ReceiveNow;
        _temptable.Unit             = _PurchLine.PurchUnit;
        _temptable.CustomerName     = _vend.name();
        _temptable.CustomerAddress  = _vend.address_BR();

        _temptable.DeliveryName     = InventLocation::find(_PurchLine.inventDim().InventLocationId).Name;
        _temptable.DeliveryAddress  = InventLocation::find(_PurchLine.inventDim().InventLocationId).address();
        _tempTable.insert();
    }
}
- see the source code below
- create SSRS Report
- create SSRS Report in Visual Studio
- named it GlkRptReturSJ
- Add data set. named it DataSet1, datasource type : Report Data Provider (RDP), click edit on Query
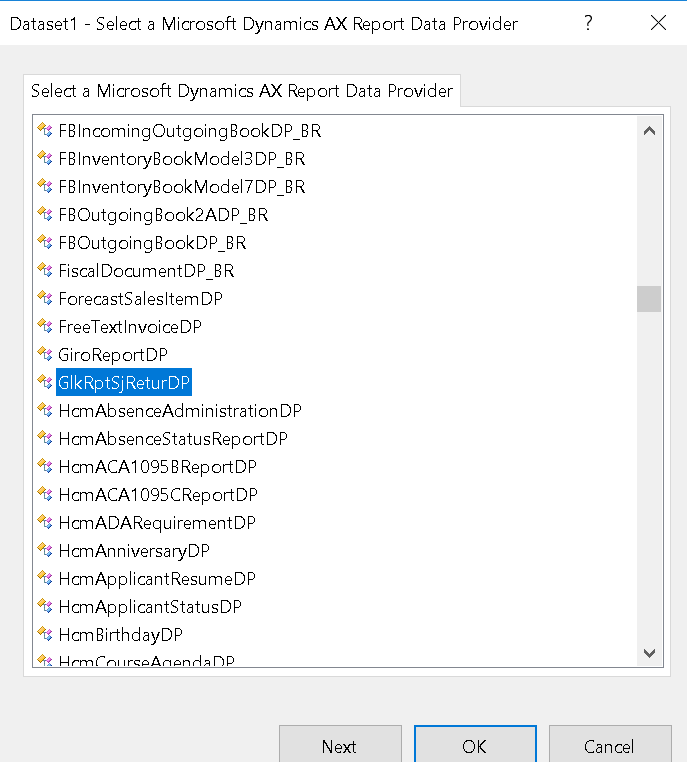
- Choose GlkRptSJReturDP as data provider

- next button, pick all fields , then ok button

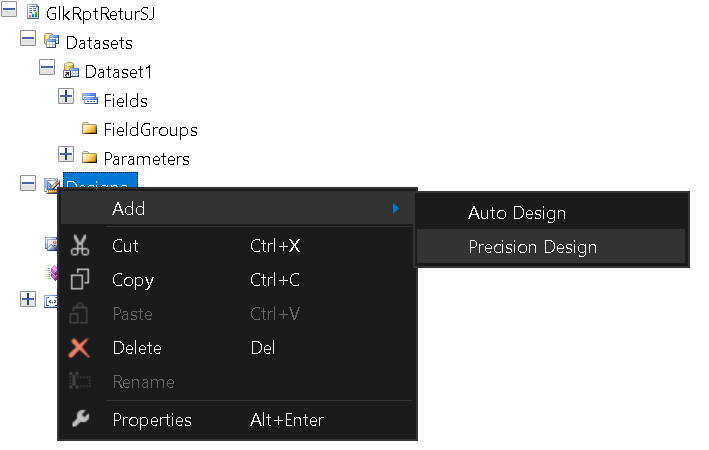
- on design, create precission design

- rename it to RptReturSJ, set Style Template in properties to Table Style Template
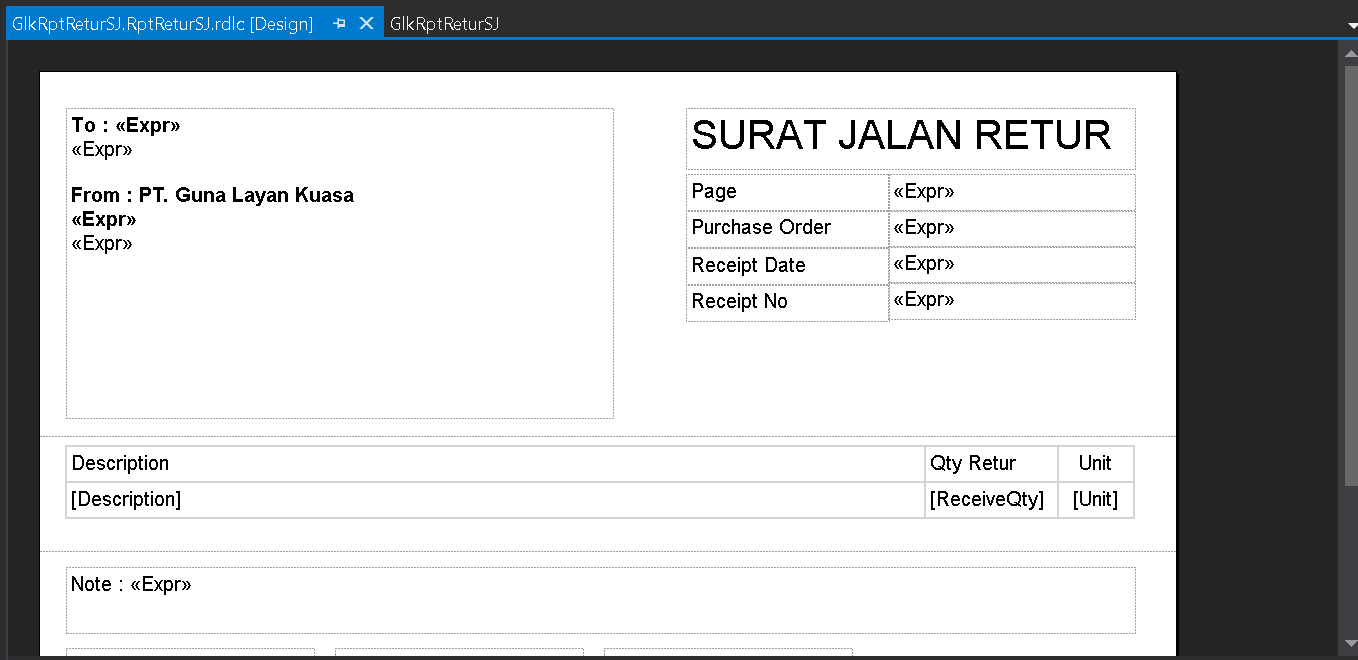
- save it, and right click RptReturSJ, choose edit using designer
- design it, and save it

- Compile it and publish it
- Creating a Menu Action
- Inserting menu action into PurchEditLines Button
recompile it, (restart Aos incase you need it)
you can download PrivateProject_GlkRptSJRetur for your purposes


